
Arduino Clap Switch with LED and Relay Using Sound Sensor
The clap switch is used in a wide range of electronic projects, to control devices by clapping or making a specific sound. The clap switch consists of a Sound Sensor module connected to a microcontroller, or to an Arduino board. And through a software code, the audio signal can be converted into a key to turn on and off electronic devices or.

Arduino Clap Switch Arduino Clap ON Clap OFF light Clap Light Switch Arduino Sound Sensor
In this project we are going to make Clapper circuit using the concept of ADC (Analog to Digital Conversion) in ARDUINO UNO. We are going to use a MIC and Uno to sense the sound and trigger a response. This Clap ON Clap OFF switch basically turns ON or OFF the device, by using the clap sound, as switch. We have previously built Clap switch and.

Clap Switch with Arduino and Sound Sensor, Arduino project with code AndProf
The proper way to make a clap light switch is to use an Arduino or a microcontroller, because it allows the device not just to detect claps but to recognise.

Arduino Clap Switch Project for Beginners
Arduino(nano) Clap Switch: in this tutorial i will be showing you how to make an Arduino clap switch let's get started! All you have to do is- clap once to turn the LED on and clap again to turn the LED off. Projects Contests Teachers Arduino(nano) Clap Switch. By The creator sid in Circuits Arduino. 7,833. 62. 8. Featured. Download.
Clap switch with Arduino and ky038 sensor Clap switch tutorial
Created on: 6 April 2016. Clapping hands together switches an LED on or off in this Arduino breadboard project for beginners. The sound made by clapping is detected by an electret microphone connected to one of the Arduino analog input pins. The first time that the clap is detected by the Arduino, an LED will be switched on.

Arduino Clap Switch (Clapper) 3 Steps (with Pictures) Instructables
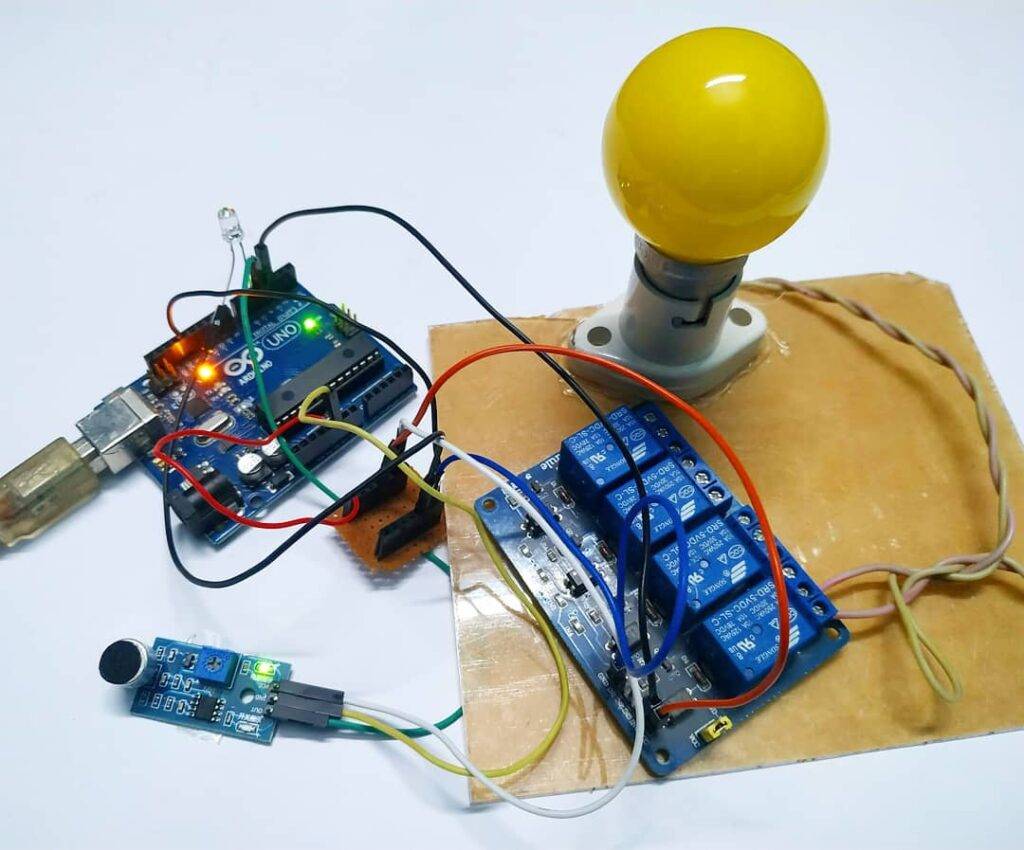
This project shows you how to make an Arduino clap switch. Also, I show you how to interface an LM393 Sound Sensor with Arduino and implement a LED and Relay.

Arduino Clap Switch Arduino Clap ON Clap OFF light Clap Light Switch
Clap Switch using Arduino. Sunday May 9, 2021 / Arduino Projects. In this project we are going to make Clapper circuit using the concept of ADC (Analog to Digital Conversion) in ARDUINO UNO. We are going to use a MIC and Uno to sense the sound and trigger a response. This Clap ON Clap OFF switch basically turns ON or OFF the device, by using.

Clap switch with Arduino and ky038 sensor Clap switch tutorial
Author. Clap Switch using Arduino. In this project we are going to make Clapper circuit using the concept of ADC (Analog to Digital Conversion) in ARDUINO UNO. We are going to use a MIC and Uno to sense the sound and trigger a response. This Clap ON Clap OFF switch basically turns ON or OFF the device, by using the clap sound, as switch.

Clap Switch Using Arduino Uno And Microphone
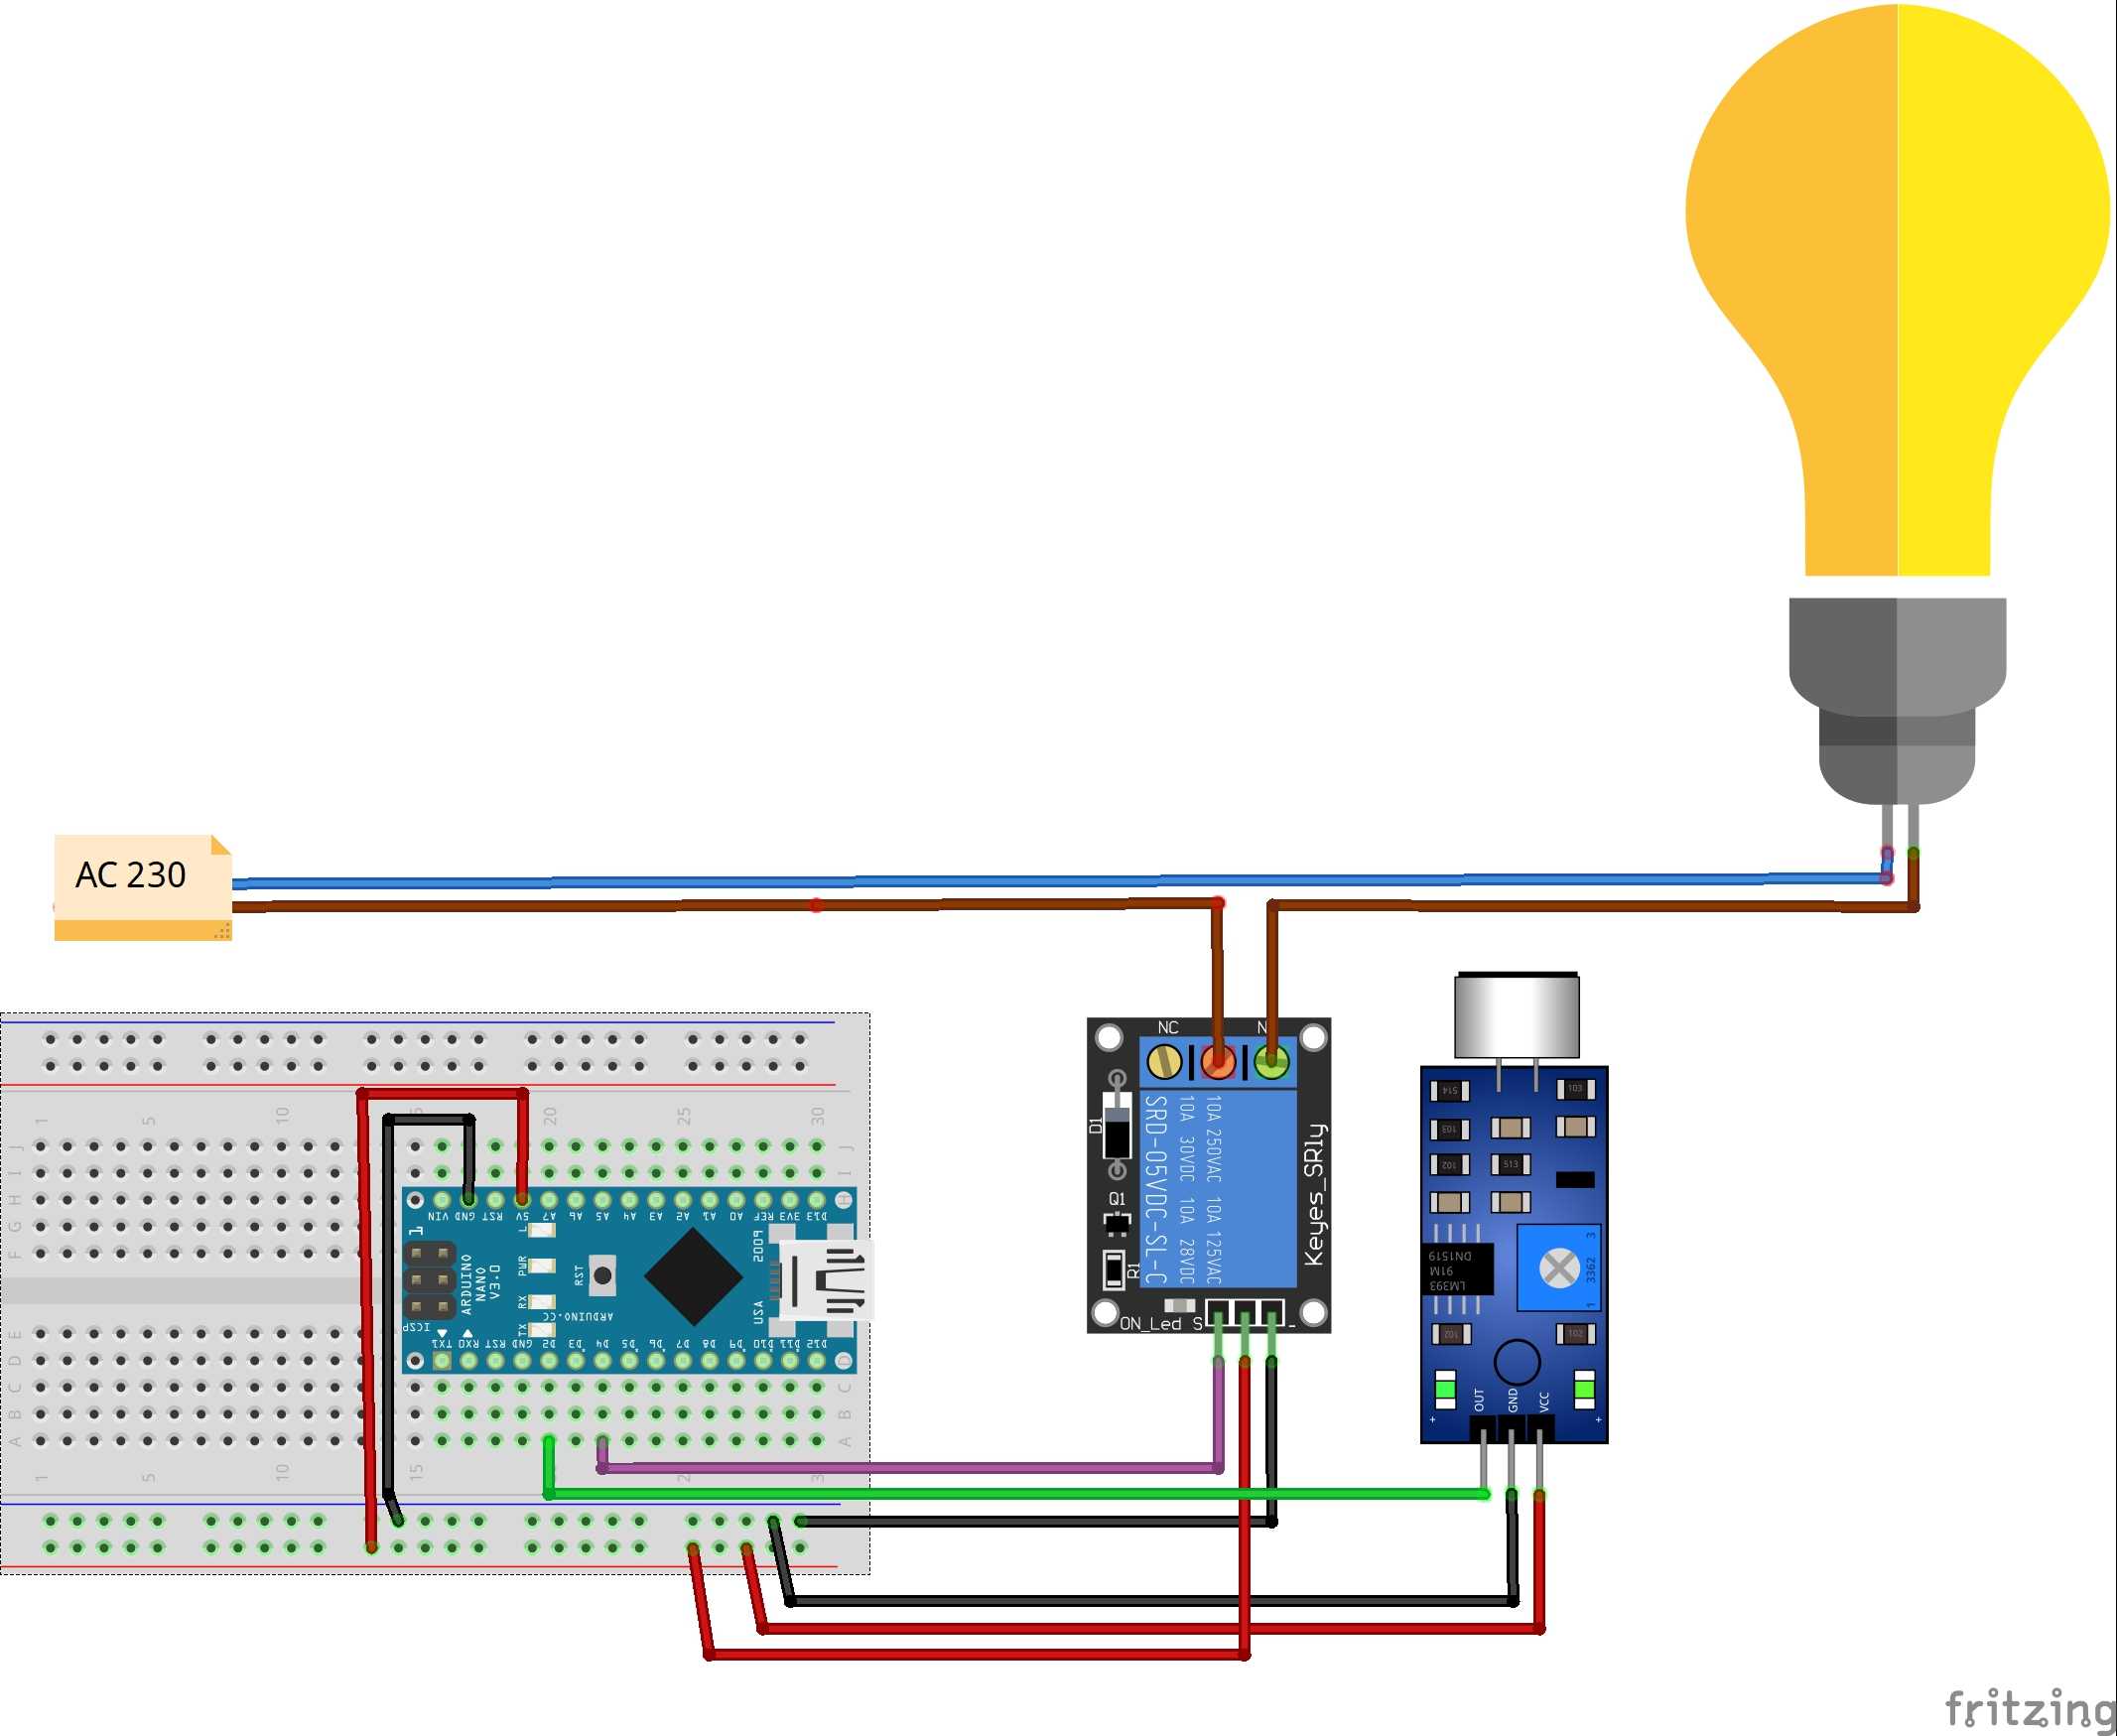
Circuit Diagram for Clap Switch. Connect the 5-volts and GND pin of the Arduino with the VCC and GND pin of the sound sensor. Attach the A0 pin of the sound sensor with the analog-0 pin of the Arduino and the D0 pin of the sound sensor with the digital-2 pin of the Arduino. Join the positive wire of the LED with the digital-9 pin of the Arduino.
Three Stage Clap Switch DIYODE Magazine
Step 2: The Circuit. Alright, so this circuit is pretty simple. Here's hot you got to do: Plug in the sound sensor into your breadboard. Connect the ground pin of the sensor to a GND terminal of the Arduino, the Vin pin to the 5V bus of the Arduino, and the Analog pin to the A0 pin of the Arduino. Now you need to set up the LED.

Clap Switch for RGB LEDs using Arduino Microcontroller Tutorials
Clap switch using Arduino. This is a easy clap circuit using arduino uno.. 1 int soundsensor = 7; 2 int relay = 6; 3 4 int clap = 0; 5 long detection_range_start 6 = 0; 7 long detection_range = 0; 8 boolean status_lights = false; 9 10 void 11 setup.
Clap Switch with Relay Arduino Project Hub
if you're looking for a 'Double Clap Switch':https://youtu.be/Hnqhi7wZKAoCOMPONENTS:1. Arduino UNO - https://amzn.eu/d/eTQkyPr2. Sound Sensor Module - https:.

CLAP SWITCH With Arduino UNO R3 YouTube
A hike along four lakes in North Zealand. Lyngby Sø, Bagsværd Sø, Vejlesø and Furesø. Go through Lyngby Åmose and on towards Bagsværd Sø. Enjoy the view over Marienborg and Sophienholm estates. Walk past Bagsværd row stadium and Frederiksdal. The trail will also pass Næss Castle and then pass Vejlesø. The trail will later come along the north side of Furesøen and through Bistrup to.
Arduino Clap Switch Controlling home appliances with a double clap! High Voltage Code
The clap switch circuit consists of an electret microphone, a 100n capacitor, a 10k resistor, a 100k resistor, a 220 ohm to 470-ohm resistor, an LED 5mm, a breadboard, and jumper wires. The electret microphone is connected to an analog input pin of the Arduino board. The 100n capacitor is connected in parallel with the electret microphone to.

How to make easy clap switch using arduino technoreview85 YouTube
This trail will go along Bagsværd Sø and Lyngby Sø, where the beautiful view can be enjoyed. The two lakes are part of the Mølleå system, where Bagsværd lake is the second largest lake in the system, only surpassed by Furesø. Bagsværd sø is known for carrying out caproning on an international level. The lake can be used by everyone for sailing these types of rowing boats, sailing.

Clap switch with Arduino and ky038 sensor Clap switch tutorial
The Arduino code provided controls the relay based on the sound intensity detected by the LM393 Sound Sensor. Adjust the threshold value by rotating the potentiometer to set the desired sound level for triggering the switch. By clicking the button in the top right corner of the code field, you can copy the code.